How you assemble your plate carrier is a matter of personal preference and is usually determined by your range of usage and mission needs. Armored Republic has put together this step-by-step guide to help provide recommendations and direction on how to set up your plate carrier correctly, safely, and with the equipment you need. Here are the areas we will be addressing:
- Armor selection
- Plate carrier selection
- Plate carrier sizing
- External accessory mounting suggestions
Before you pick a plate carrier to set up it is important to select the correct armor size and type.
Body Armor Size & Type
You wear body armor to protect your vital organs so ensuring that area is protected is the most important choice when deciding what you need.
Most people between the heights of 5’4” - 6’3” can be protected by 10” x 12” sized plates. Those taller than 6’4” will see a benefit from using 11” x 14” sized plates. The best way to determine your armor size is to measure from the top (starting at your collar bone) to the bottom (2” - 3” above your belly button). Laterally you want protection coverage from nipple to nipple.
Once you have determined what size armor you need, the next thing you can begin to assess is what type of armor you need. This usually falls under two categories:
- Soft, lightweight handgun-rated armor for concealment usage
- Rifle-rated plates for higher velocity threats
For a more in-depth understanding of different types of body armor, the protection levels, pros and cons, and more- we recommend reading our Body Armor 101 guide.
Now that you’ve chosen your body armor, we recommend considering the questions below:
- What will you be using the armor system for?
- Are you using this for concealment and everyday carry like going to the store or staying protected at work?
- Will the purpose of your armor be for overt usages such as range training and general home defense?
Once you have determined how you will be using this armor, you can begin to deconstruct what type of carrier you want or need. By this point, you have ensured your carrier is:
- Able to fit the plate size you need (10” x 12” or 11” x 14”)
- Able to accommodate the armor type you need (soft armor, steel alloy, polyethylene, or ceramic)
- Able to employ the armor in the manner you need (overt vs covert)
Now we can move on to the primary focus of this article: How to set up your plate carrier. We will be using our Invictus and Testudo plate carriers as examples for this setup.
How to Set Up Your Plate Carrier
Which Direction the Carrier Should Be Worn
The first step in this process is identifying which way your carrier needs to be worn. There are three different methods you could use to potentially identify this:
- Drag Handle: this is a frequent integral part of most plate carriers. The drag handle is always located at the top of the back side of a plate carrier.
- Cummerbund: will always be disconnected and connected on the front side. Every time you put your carrier on, you are making micro adjustments based on your size, at the time you put it on. The back of the carrier plate pocket will be where you make your macro adjustments. Typically so long as you are not going up and down in vast quantities of weight or size, you will only need to adjust the back side of the cummerbund the first time you get your carrier. From there, every time you put your carrier on, it will be adjusted to you on the front side by lifting the cummerbund flap, and rescuing the right and left sides.
- Internal Tags: just like your clothing has a tag on the back side, internal tags on the body side of your plate pockets can also be a clue as to the orientation of a carrier. Tags are generally sewn onto the back side.
Plate Carrier Sizing
Take important note here: sizing can potentially refer to what size plates the carrier will take (armor inserted) or what size the plate carrier will adjust to (your actual torso size).
If you are not sure, it's always best to refer back to the manufacturer of the plate carrier to determine the sizing before purchase. Keep in mind most carriers on the market are one size fits most, but not all.
Other plate carriers, like those issued in the DOD are issued in fixed sizes: Small, Medium, Large, and XL. Each one of these sizes refers to not only the armor size (XSAPI) inserted into it, but also a small preconfigured range of sizes (torso) these carriers can adjust to. For example, a Medium DOD plate carrier will house a Medium XSAPI and will fit a range of users who would be closer to a “Medium” t-shirt size. This is in contrast to civilian and LEO style plate carriers that will fit a broader range of torso sizes such as Medium to XXL.
Most plate carriers sold in the civilian and law enforcement market will be adjustable in the shoulder strap and cummerbund/side buckle area allowing fitment between a wide range of users. For example, our Testudo Gen 2 will house 10” x 12” and 11” x 14” size plates and will fit a range of users who wear a t-shirt between the sizes of Medium - 3XL.
Adjusting the Plate Carrier to Have Your Armor Sit Correctly
The first adjustment you will make will be to ensure that the body armor inside your plate carrier is sitting correctly. It is not uncommon for body armor to be incorrectly placed on your torso to where it sits too far up or too far down- preventing it from protecting your actual vital organs
The steps below will outline how to ensure that your body armor is placed and positioned correctly in your plate carrier:
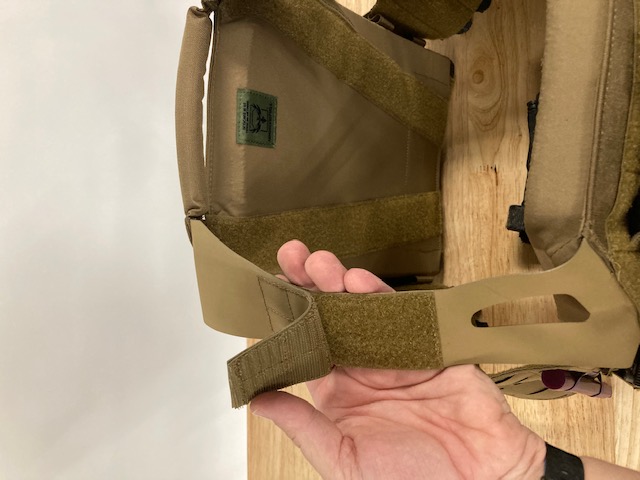
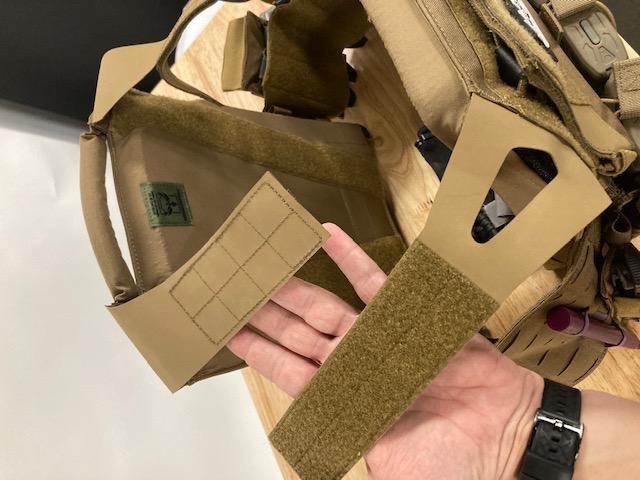
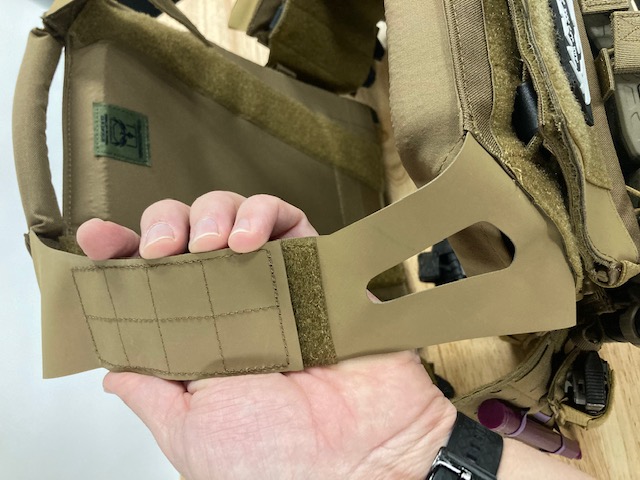
1) Adjust the shoulder straps
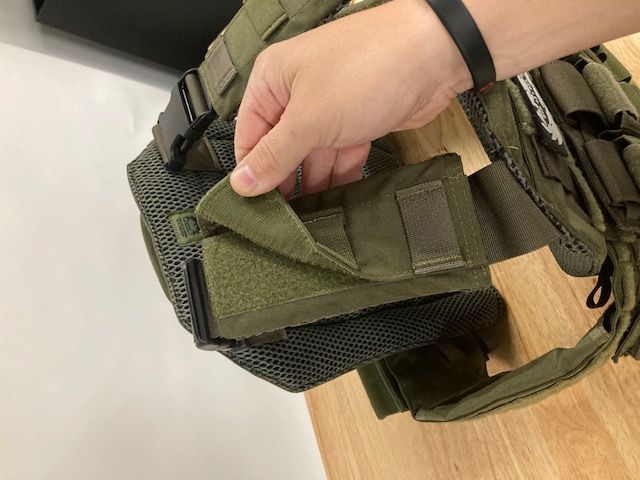
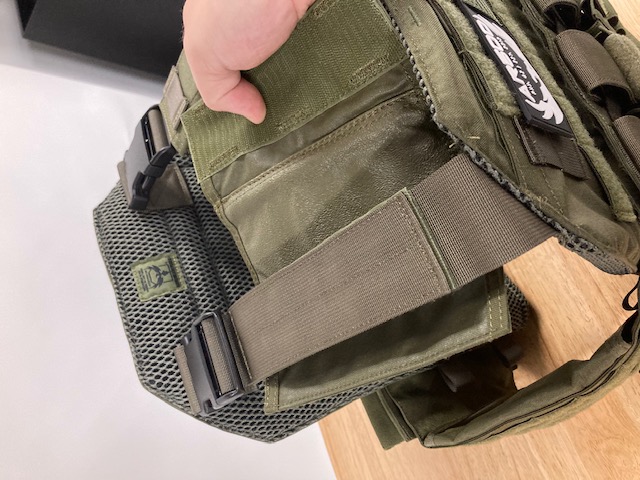
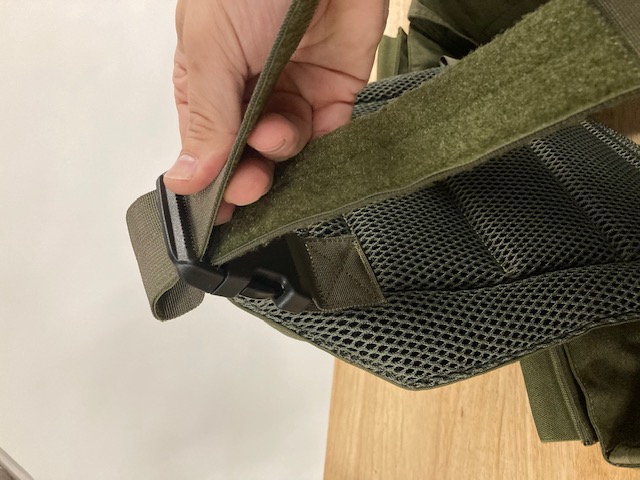
First, you will need to open up the shoulder pads (if your carrier has them). Then, you will need to either elongate or retract the slack in your shoulder strap based on your torso dimensions.
Shoulder Strap Adjustments - Invictus
Shoulder Strap Adjustments - Testudo
2) Repeat this process
Repeat this process until the plate pocket sections (where your body armor is held) of the carrier are suspended over your vital organs (as discussed above, from clavicle to naval) and are parallel to each other vertically. Some carriers like our AR Invictus use sections of velcro in the shoulder strap that need to be separated and reattached at different points, while other carriers like our Testudo Gen 2 have buckles where slack from the shoulder strap can be fed through. Once your plate carrier is adjusted in the shoulder area, re-secure your shoulder pads.
3) Adjust the back side of the cummerbund
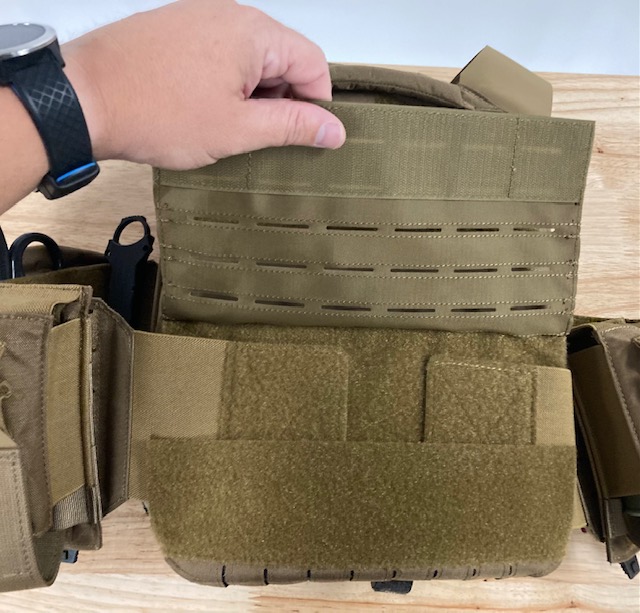
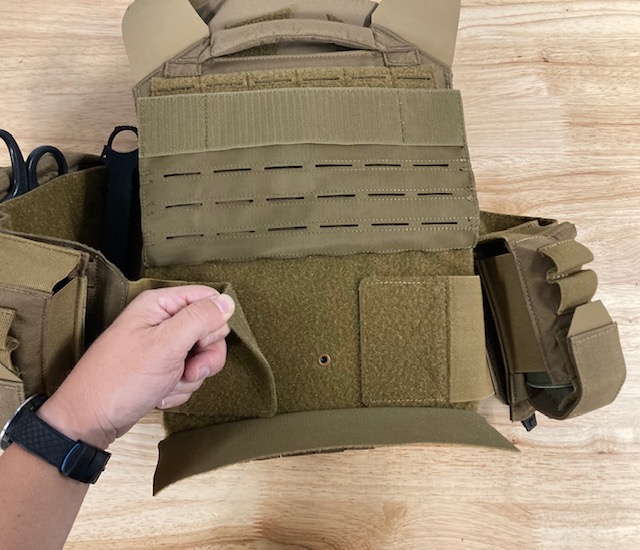
The next area we now need to adjust is on the back side of the cummerbund. Usually, there is a pocket on the back side that will house the cummerbund adjustments. This pocket could be similar to the front side in that it simply attaches via velcro and needs to be pulled up (like our Invictus carrier), however other carriers need to have the cummerbund rotated out of this pocket laterally for the adjustments to be made (such as with our Testudo Gen 2).
Back Side of Cummerbund - Invictus
Back Side of Cummerbund - Testudo
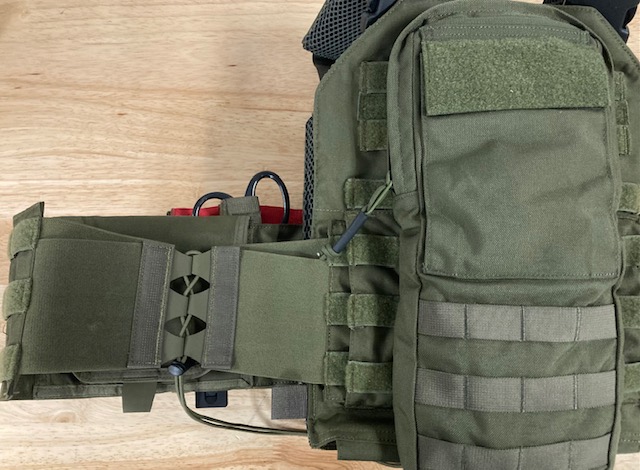
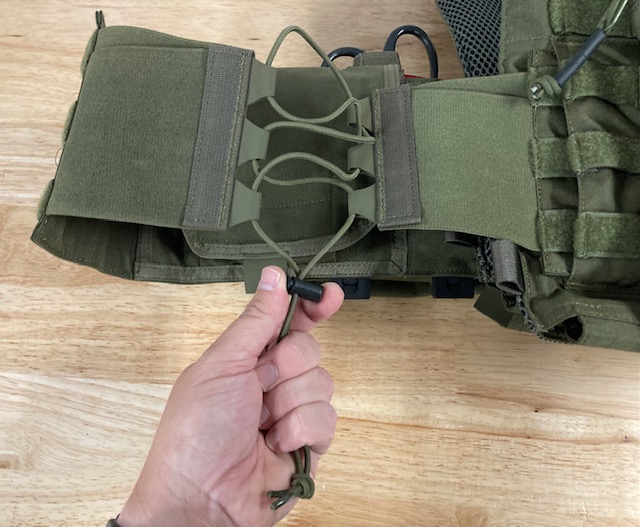
After you have located this pocket, you will then need to adjust the cummerbund. Depending on the cummerbund type, you will either be moving 2 velcro anchors laterally (Invictus) or you will be tightening/loosening the cordage that attaches the two halves (Testudo). From there, every time you put your carrier on, it will be adjusted to you on the front side by lifting the cummerbund flap up when you put on or take off your carrier. So long as you are not going up and down in vast quantities of weight or size, you will only need to adjust the back side of the cummerbund the first time you get your carrier.
Adjusting the Cummerbund - Invictus
Adjusting the Cummerbund - Testudo
Pouch(es) Set-Up on Your Plate Carrier
Now it is time to consider what additional equipment you may need for your mission:
- What pouches do you use and where do you use them?
- Why do you mount them in specific areas?
In order to answer these questions, let’s divide your plate carrier up into notable sections or “quadrants”:
- Front Plate Pocket
- Back Plate Pocket
- Strong Side Cummerbund
- Support Side Cummerbund
These sections can further be divided into positions of a clock face (3, 6, 9, and 12 o’clock).
You may notice that the cummerbund has been divided up into “strong side” and “support side” instead of the “right” and “left” sections above. This is because this conversation will address the configuration of pouches by both right and left-handed users. To clarify, your strong side will be the side you draw your pistol from, while your support side will be the side you reload a weapon with.
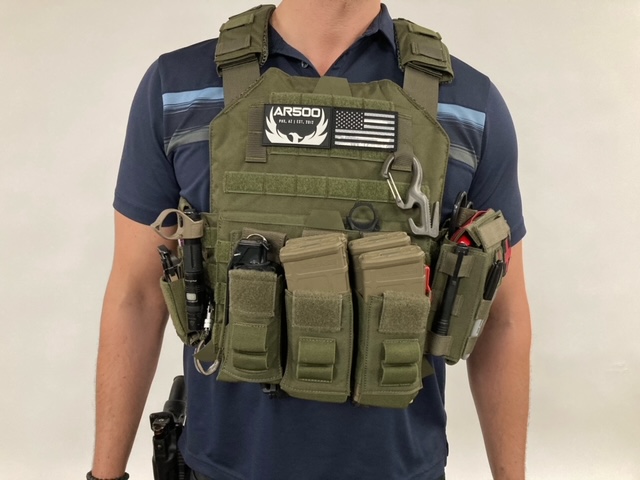
1) Front Plate Pocket
This is your front side or 12 o'clock position. This is considered your “front line gear”, or the gear you need to get at the fastest. The most common pouches you will see mounted in this area are:
- Magazine reload pouches
- Fighting knives
- Admin pouches
- Anything else that you need to get at quickly and instinctively under stress
Front Side - Invictus
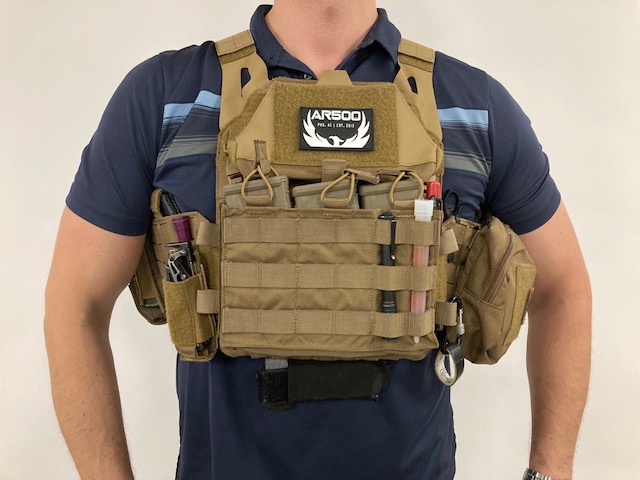
Front Side - Testudo
2) Back Side Plate Pocket
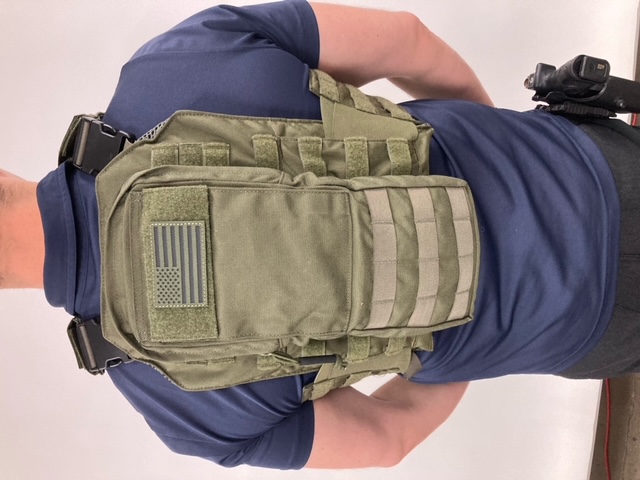
This is the backside or 6 o’clock position. Back side carrier usage can be a debated topic in terms of what to employ back there. The best approach for what works best for you is relevant to your predicted armor usage. Some carriers employ a back side zipper panel that allows you to easily transition between vehicle operation and long-range foot patrols / CQB (close-quarters battle) by adding or removing the panel.
The primary topics of discussion here are:
- Vehicle employment/integration of armor: if you are using vehicles in your day-to-day operations it would be best to keep your back side slick. This will allow your back to be as close to your seat as possible.
- Individual usage: Most people domestically use their plate carriers for training on the range and conditioning. Others however have used their plate carriers during long-range dismounted foot patrols. Either way, since you are a human and need finite resources to function, it’s important to make sure you have a good amount of water. Depending on your individual needs, using a 2-3 liter hydration pouch or some type of back side-mounted “3-day” pack for more sustainment like MREs and additional ammo can be a formidable option here.
- Team-based operational environments: if you are operating in a team-based environment and on the aforementioned long-range foot patrols, it can also typically serve you well to consider using the MOLLE (Modular Lightweight Load-carrying Equipment) on the back side of your carrier. MOLLE is a modular loop-to-loop interface that allows you to customize your loadout by adding and removing pouches and gear as needed. Some pouches that work well here are:
- Hydration carriers for water
- Grenade pouches
- Magazine pouches
Back Side - Testudo
3) Strong Side Cummerbund
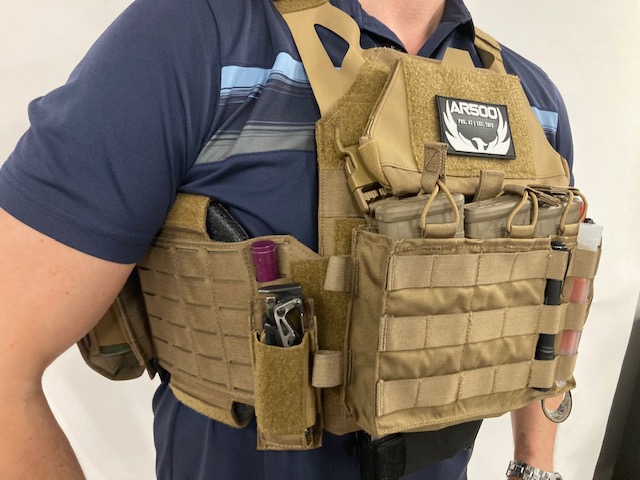
This is referring to your dominant shooting hand. If you are a right-handed shooter, your right side cummerbund half is your strong side. It's important that if you are using a sidearm like a pistol, you keep this area of your carrier free of pouches, because pouches mounted above your pistol can (and will) cause issues when presenting, throwing your aim off and often causing overcorrection. This can cost you your life. If any pouches are to be used here ensure that they are as thin as possible. Usually, one small pouch can be used at the front (so 1-2 o’clock position for a right-hand shooter) and the curvature of your body at that angle will not disrupt your sidearm draw. The most important thing here is to ensure after you have set up your carrier, you attempt to draw your sidearm from different positions (lying down, seated, kneeling, etc) to ensure you are not getting any sidearm disruption.
Strong Side Cummerbund - Invictus
Strong Side Cummerbund - Testudo
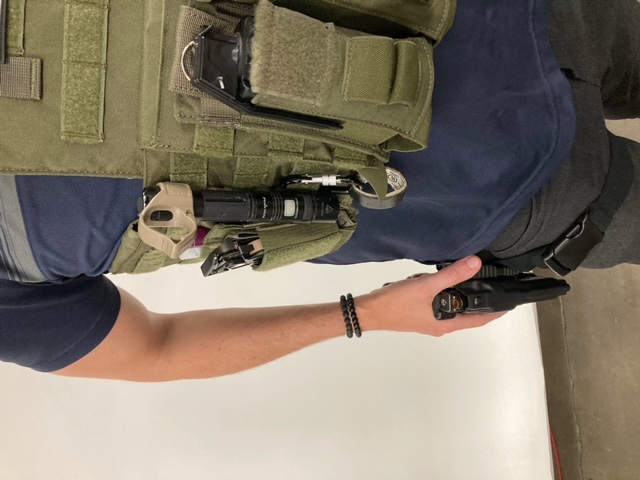
4) Weak Side Cummerbund
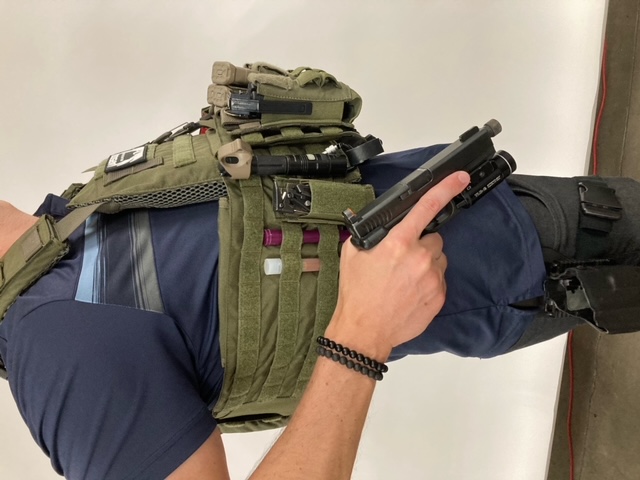
This side of your carrier is where you can put the bulkiest items. Your best spot to put your bulkiest items will be at the 1-2 o’clock position for left-handed users and 10-11 o’clock for right-handed users. If you are using a battle belt then you need to take note of what pouches you have on your battle belt below the pouches mounted on this side. If your pouches are too bulky, you could still run into a similar draw disruption issue while grabbing a spare magazine on your belt. Generally speaking, however, this side will be where you want to put your heavier or larger items such as:
Radio
Extra rifle magazine pouches
Grenade pouches
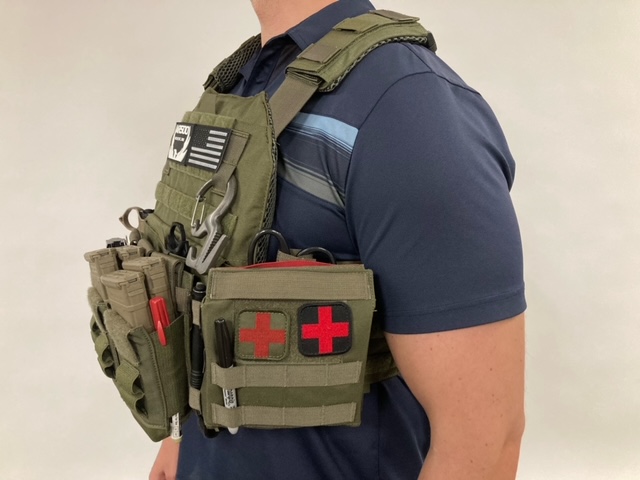
In closing, the most important aspect of your set-up and ensuring your carrier/pouch configuration works best for you is to go out and train in it. You do not want to find yourself in a trial-by-fire situation figuring out what works and what doesn't when you need to defend yourself and your family's lives.